Level: Beginner
Adobe CS1-CS6
The old vintage cameras had very unique colors in them that people really love. In this tutorial I will show you how to duplicate that old film coloring for your photographs in Photoshop.
This is my final result and the great thing about this technique is you can use it with almost any photograph and it is super easy.
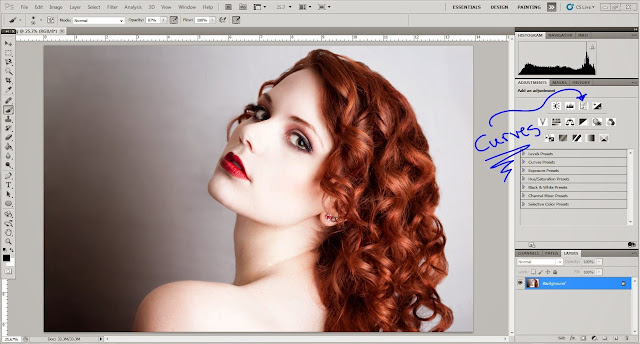
This is my work space set up. I labeled the adjustment panel and the layers panel because that is what we will mostly be using. If these panels are not open you can find them by going to
window > layers
or
window > adjustments
Now open the photo you are choosing to edit by either dragging the photo from the folder to Photoshop or
file > open
Once open select the curves adjustment
Curves work on anchor points. I usually always create two extra anchor points placed as shown above. Too many anchor points can give you weird colors and just one anchor point doesn't allow for very much flexibility. I encourage you to play around with the curves until you feel comfortable with how they work or until you like how it affects your photo. I played around until I liked this contrast. You can duplicate my curves adjustment or try one of your own.
Once I got my photo to a nice contrast I click the drop down menu to choose which colors to start changing. Once you click the drop down menu you will see red, green, and blue. I like to start with blue and work my way up and that is what I will be doing in this tutorial.
With the blue curves adjustment selected I set the line to what is shown above. This adds yellow and blue to the image. The key to the colored curves adjustment is less is more. Usually small changes in the curve line will make dramatic differences. Also, always keep in mind that once the photo is printed the effects will be more dramatized.
Next, I selected the green curves adjustment and set the line to what is shown above. This adds green or red to the image.
Lastly, I selected the red curves adjustment and set the line to what is shown above. This adds blue or red to the image.
Once I like how my photo looks, it is time to save it. In order to save this as a .jpeg file I have to flatten the layers. To do so, right click on any one of your layers and select "flatten layers"
Your layers panel should look like this after flattening your layers. Now you can save by going
file > save as
This is the difference a little curves adjustment can do to a photo. Every photo is different so I encourage you to play around with the curves on each photo because results will turn out differently on different photos. This technique is an easy way to add drama to your photos or get the lomography look without an old film Dianne camera.
Any Questions?? Shoot me a comment and I'll be sure to answer them! Thanks for reading!!!


