


Textures are a great way to add a little drama
to a photo without adding a whole ton of work. They can give a great vintage
effect or even add grunge to a photo to make it more edgy. In order to
understand how to add textures to a photo, you need to understand how layer
modes work.

This is how my workspace is usually set up. I have my layers panel at the bottom left corner. If you don’t have your layers panel open, you can open it by going
Window > Layers
If you have your work-space how you want it then you can go ahead and open the photo you would like to add texture to.

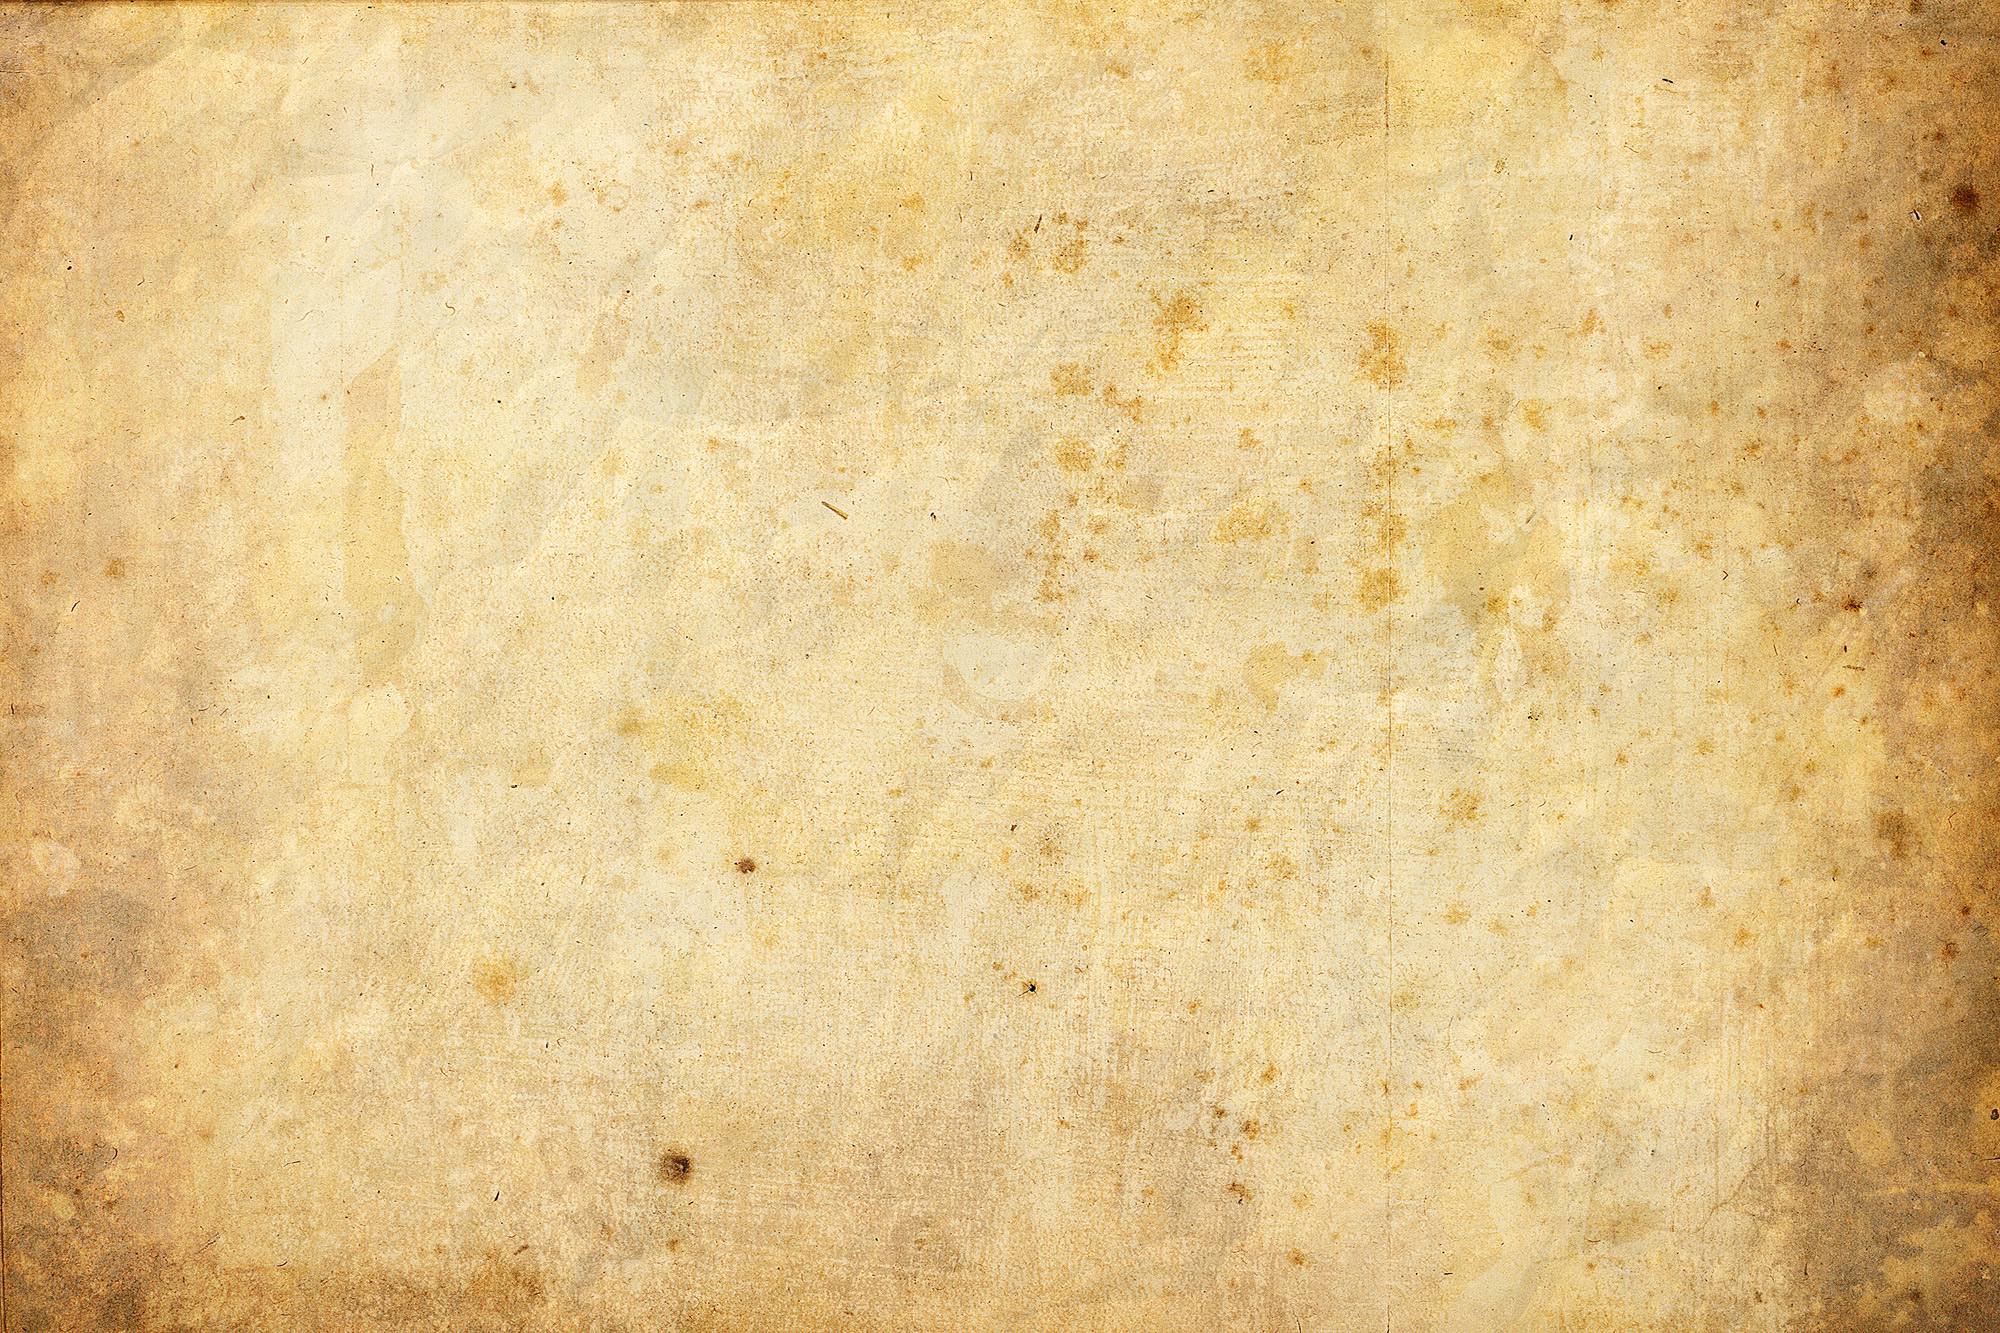
I am going to add a vintage texture to this photo to kinda age it just a bit. I have this paper texture I found at:
Once you have this texture (or the texture of your choice) downloaded to your computer, drag and drop the texture from your files onto the top of your photograph in Photoshop. Resize the texture if it does not cover the entire photograph. The texture’s layer should be the only thing you see and this is where layer masks come in. Right now the texture’s layer mode is set on normal. If I were to change the layer mode the underlying image will be able to be seen.
These are a few of my favorite layer modes I like to use with photographs. I kept the opacity at 100% so that you can see the effect they really have.

1: Normal
2: Darken
3: Multiply
4: Color Burn
5: Linear Burn
6: Darker Color
7: Overlay
8: Soft Light
9: Hard Light
Try out all of the
layer modes to see what they all do. They all have a different effect and can
help you reach the style you might be going for. Each layer mode looks
different on different photographs as well. If you find one you like for one
image it might not look as good on another. For this particular image that I am
editing, my favorite layer mode is multiply.

I don’t like how intense the texture is so to
tone it down I will lower the opacity to about 75%

If you like how it looks
you can definitely stop there but I want my flowers to have a little less of
the texture on them so they stand out better. To do so I will create a layer
mask for my texture layer.

Select your brush tool
and set the hardness to 0. Lower the brush opacity to 25% Make sure the color
you will be painting with is black.
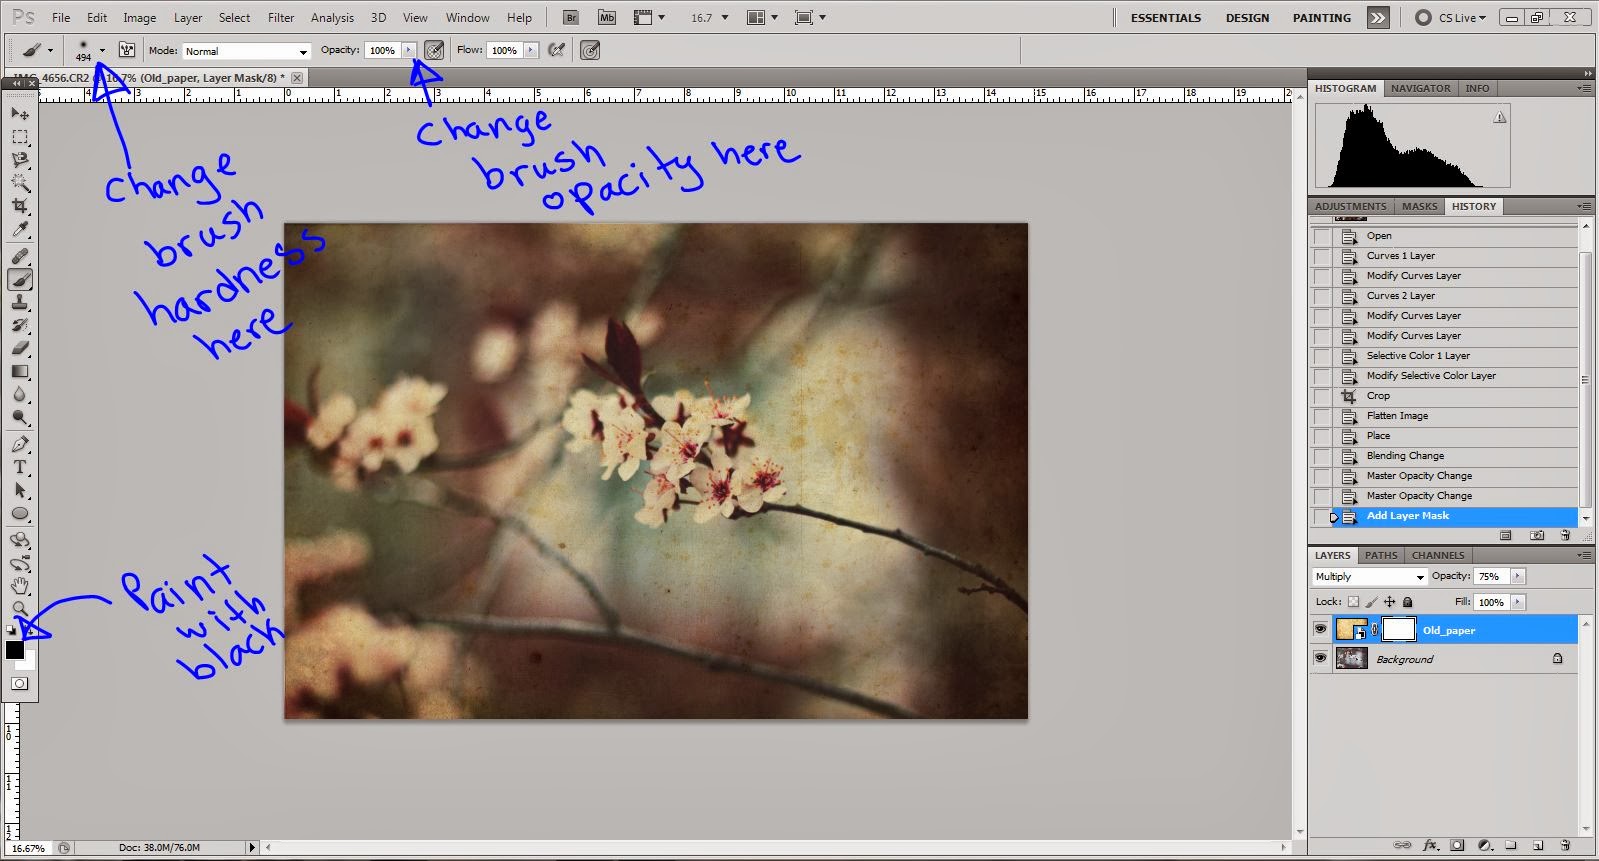
Any part of the photo
that I will paint black will be erased. I lowered the opacity because I did not
want all of it to be gone, only some of it. If you want to bring the texture
back then you can paint the layer mask with white.

Now to finish with the
final touches I will add a curves layer just to lighten it up a little

In order to save your
photo as a jpeg you have to flatten the image. To do so right click any layer then click flatten layer. Save it and then you are done!

Let me know if you have any questions, comments, or show me what you used this technique with! Thanks for reading!!!
-Ruthie's Magical Camera
